
Having built a pull-out bed before I went into this stage with a bit of confidence and it’s surprisingly easy to make a bed like this with minimal tools or knowledge anyway. The thing to be mindful of is taking into account the thickness of the wood when planning the size of the finished product – I’ll explain all of this further on – and even though I knew this I still made a couple of mistakes and was left scratching my head more than once!
My main consideration was that I wanted a comfortable bed, and for it to be wide enough to sleep two people spaciously. A narrow bed is fine when you’re sleeping next to your girlfriend, but when you’re road-tripping with a smelly unwashed hairy climber friend, a bit of space on a night becomes very welcome. For these reasons I wanted minimal breaks in the mattress; every break joining two parts of mattress is a potential point of discomfort, and I wanted to be able to have a UK king-size bed (150cm wide). These two points were the cause of much of the head scratching.
The first thing I did was look at what mattress I was going to use; once I had this I would find it easier to work everything else out as I’d have a base to build around. A trip to Ikea provided me with a MALFORS single mattress. It’s foam so will be easy to cut to the size I need, but also nice and comfy, and it didn’t break the bank. I bought one to be cut down lengthways to be the seat cushion for the sofa, and another to be cut lengthways as well, for the bed extension, and widthways to provide the seat cushion for the L-shape section of sofa.
The next step was to work out how much and what types of wood I would need for legs, frame and planks. I drew a quick sketch of the planned bed, and marked up the measurements I’d need – 190 long (the length of the mattress) 150 across at the L-end (the width of the bed when extended) with depths of 70 (standard sort of depth for a sofa) at the L end, and a depth of 80 on the longer side, this is quite deep for a sofa but is needed to be able to extend into a kingsize. This sounds complicated but hopefully a picture paints a thousand words.

I began by building the frame of the sofa, and then built the pull out bed section afterwards. From this sketch I knew I’d need to start with one length of 190 which would be screwed to the van frame, one at 120 to make the front of the sofa and two at 150 to make the L-shape. I also needed 8 legs, although I thought I only needed 7. Thankfully I had an off-cut that was long enough to make up for it, and I didn’t need to own up to that so I hope you appreciate the honesty!

After jointing and screwing the timbers in place I was ready to attach the planks. On my last van I’d used some pencil edge architrave which had worked out far cheaper than other wood. I opted for the same again but hadn’t accounted for one thing: This bed is far wider and the sofa element much deeper than in my previous van, meaning that the pencil round wasn’t thick enough and flexed an alarming amount. So I took it all off and replaced it with something a little thicker and stronger. This could have been seen as a bit of a waste of money, but thankfully I can just use the thinner wood for other parts of the build.
To calculate how much wood I’d need to buy for the planks I took the length of each section – 150 for the L-shape for example – and then divided it by the width of the wood I found at the timber yard, something like 7cm. Then I took off a few to allow for the spacing, and worked out the total length of that type of wood I’d need to buy – 14 x lengths of 70 long planks for the L-shape – and that gave me the length I’d need to buy – 980 in this example. I did the same thing for the long section of the sofa.

With the planks on it was time to make the extension. This was the part which gave me a real headache as I needed it to pull out to a total of 150cm. This sounds simple (and probably is) but for my poor northern brain it took a lot of thinking. The issue here was taking into account the thickness of the wood used to make the frame. I’d need 2 sections that added up to 150, so logical thinking would mean that both would need to be 75. However, this is not the case as the extension is contained within the fixed section and its frame butts up against the front of this fixed part. hopefully the pictures explain this better than I can.
Making the sofa 80 deep meant that I could fit the extension within it and the 5cm lost by the thickness of the wood was negated.


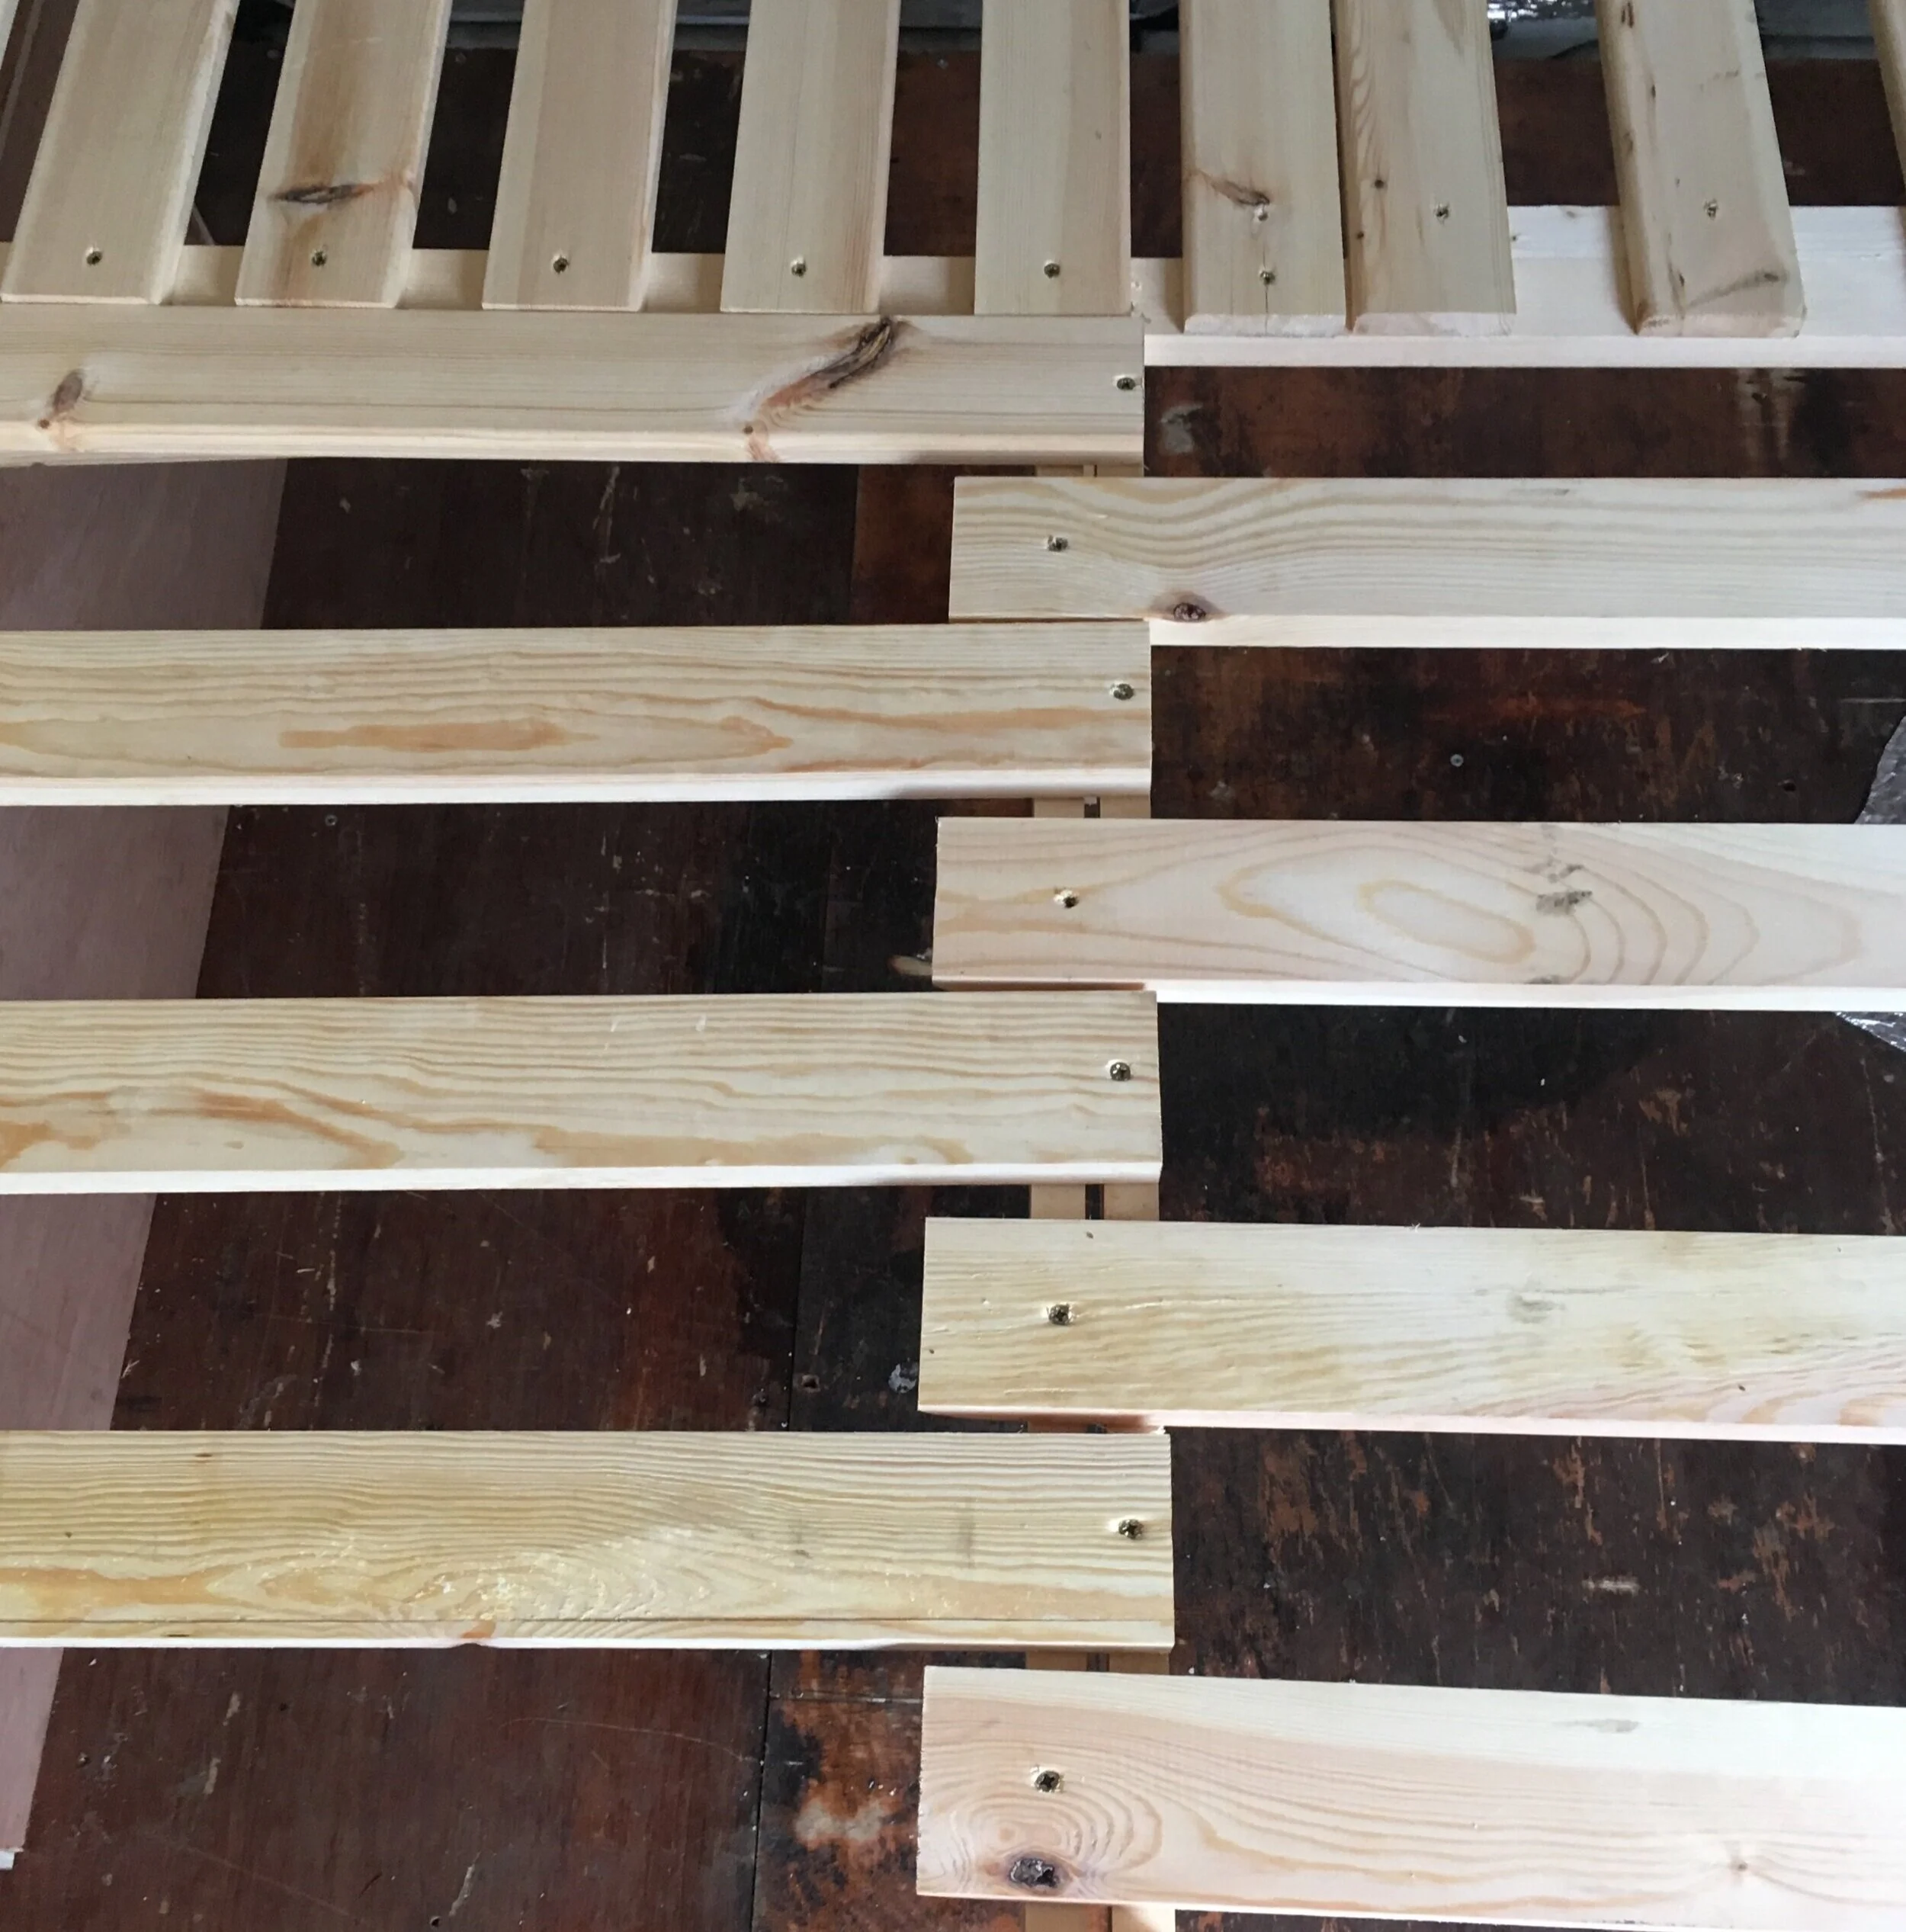
To make the extension slide well I used some washers to separate the moving parts from the fixed ones where necessary, and I also built a runner on either end for the frame to slide along and stop it from dropping under its own weight.

Washers on every other plank to help with freedom of movement for the sliding extension

I decided that I’d make an access hatch for the under-bed storage on the L-shape as there were no moving parts to contend with. It’s super simple with the planks just being screwed to a small frame that fits inside the frame of the sofa. I thought about adding hinges, but I actually like the simplicity of just lifting
it out and putting it back in so I’m happy with that. it also means it can be accessed from any direction without difficulty.

In an attempt to creatively store the extra piece of mattress that will not be needed when in “sofa mode” I tried to make a storage area underneath the sofa. This seemed like a good idea as I didn’t think using it as a backrest would look great or be particularly comfy as it’s a big bit of foam and would be flat against the wall in an unnatural position (This was the case with my last van). But what I hadn’t accounted for here (there’s a definite developing theme with my expectations vs reality) was the wheel arch.
Its position under the sofa meant that the only way to fit the spare mattress underneath was having the height of the sofa 12cm (the thickness of the mattress) above the wheel arch. This gave me a total height of 53cm for the sofa. After building it I realised that my feet only touched the floor when I was sat right on the edge of the sofa, not when I lounged back, and worse than this, I found that I was almost looking down out of the window, limiting the view I would get.
The window is a huge feature in this van, and the sofa being comfortable is really important to me as well, and frankly I’m looking forward to lounging out on the sofa looking out of the window at an amazing view, so there was only one thing for it; I ripped it all out, cut 8cm off all of the legs, and rebuilt it again. Now I’m happy with the height, and I have half an idea of building a sun-lounger style backrest so I can adjust the angle of the back (which will now have to be the spare foam) and then fold it away when I’m using it as a bed. Or maybe it’ll just be comfy as a backrest without the need for more fiddly jobs?
All in all it took me two days to build the sofa bed, and then an additional half day to rip it out adjust it, and put it back in. Buying all of the wood from a local timber yard meant it cost just under £50. It’s not 100% finished yet as I’ll be adding storage underneath and also strengthening it up with solid sides, but I’ll do this when I’m building the rest of the interior. Hopefully it’ll give me many good nights sleep on the road :)
